Guns
Top to bottom:
A- BAR (Browning Automatic Rifle) 300 Winchester Magnum.
B- Remington Model 1917 military 300 Winchester Magnum.
C- Remington Model 740 (Semi Automatic) 30/06 ( 10 round magazines are readily available at 35.00 costs).
D- Remington Model 700 (Bolt action) 30/06
Notice two calibers and each is represented by both a bolt action and semi automatic weapon. I can safely stock pile ammunition in large quantities, with-out relying on a lone rifle to fire it. I have the luxury of a semi auto and the dependability of a bolt action for each caliber.
Both calibers are sporting calibers, the 300 is excellent for large game. It also has an armor piercing ability that is unprecedented by any ammunition off-the-shelf, and is readily available in the US.
The 30/06 is ideal for medium game such as deer. It is no longer a military round, widely used in World war I and II, Korea, (When we fought wars to win and we won them). It was phased out in the onset of Vietnam (The first war we lost). (Granted Korea was a foggy victory, we were experimenting with police actions).
Clyde Barrow (Bonnie and Clyde) used a BAR in its original caliber of 30/06. An experienced law man, had a run-in with them, he later said "That little lady firing that big gun just rattled my cage" He sought cover, allowing Bonnie and Clyde to escape.
If he thought a 30/06 was bad imagine being down range of a 300 Mag. The magnum is close to twice as loud. I wish I could say the bark is worse than is bite. Its not. The bite is fatal regardless of where you get hit.
Do you remember the bandits in southern California, that wore body armor to rob a bank. The police weapons were useless against their armor. If one man were their with a 30/06 the battle could have been over in firing just two rounds. A 30/06 would have easily penetrated their armor and inflicted fatal wounds. A 300 magnum would have gone through both the armor the person and back out the other side of the armor. Like wise the police were shielding themselves behind vehicle doors, also wearing their protective vests (even the combination of door and vests would not offer sufficient protection against these "sporting" calibers). If the bandits were armed with a BAR the battle would have clammed LEO lives and a likely victory for the bandits, Even though they were confronted by far superior numbers. The difference being each shot would have been deadly.
Maybe you can buy several 223 rounds to every single round of my 30/06. And your AR-15 magazine capacity is 3 times mine. If we are on opposing sides, and each of us are taking cover behind a vehicle door; which gun do you want in your hands?
Neither rifle or caliber is the end all best for everything. but all are an essential part to my preparation planning. Remember the shampoo commercial ( Head and Shoulders) slogan: "you never get a second chance to make a first impression". The same could be said in a gun fight, I plan to make the first impression 'loud and deadly'.
Sunday, July 18, 2010
Patch a tire
Patch a tire
I like to do my own tire repairs, I started doing tires when I was a diesel mechanic. Not often but I would repair a tire when need. In big truck land doing a tire by hand is basic 101, you can also dismount a car light-truck or implement tire by hand, the tire shops use a machine on small tires but if you have more time than money read on. Besides, after a collapse a tire shop may not be available.
Start by removing the valve stem core, the top pic is the tool to remove it. Next you need to break the bead on the tire and rim. I use an out-rigger from a crane truck, it hydraulic moves down and puts pressure on the tire breaking it from the wheel. They make a sledge hammer for this but my way is less work, you can also use a tractor bucket to do this or use a bottle jack and position the tire under something heavy like a vehicle and place the bottle jack in between them and jack away. Also you could use a vehicle and drive over the tire to break the bead. However you decide to do it be careful not to bend the rim. If you do bend the wheel use a sledge hammer with a tapered end and pound it back to a reasonably true condition.
Basically you have two types of set ups for tires most common is a tubeless radial, that's what is on every car and light truck since the 50's older semis and implements have a tube. Some tubes are radials some are not. If it has a tube and the tire says Radial that's what tube goes in it. Today, I'm changing an implement tire.
Now you need two bars the long bar with the curved ends is called a tire spoon. Two spoons are better but I use a pry bar. Stand on the tire so it is half way down the wheel. The wheel is recessed inside at about the half way area of the wheel. Note on a dully wheel the recess is on one side so you need to dismount on the side closest to the wheel recess. Look closely and you will see what I mean. You need to pry the lip off the tire over the rim. The recess in the wheel provides room to allow the side being pried on enough room to do this. After you get one portion over insert your pry bar to hold it out, then remove the spoon and pull another part of the tire over with the spoon, Do this a few times till its over the rim. Do the same to remove the second tire bead. If its a tube and tire just remove one bead of the tire and remove the tube.
Now just follow the directions on the patch kit its available at auto part stores and farm supply stores.I forgot to mention if its a tubeless tire mark the location of the puncture before removing the tire. If you cant find the hole in the tire or tube dunk it under water, I use a horse trough. On a radial tire use a "radial only" patch. On all others any patch should work. To patch a tube you can also use a piece of an old tire, as a patch. Be sure to rough up any gluing surface of the rubber. The patch kit comes with a metal scoring tab, I use a die grinder with a buffing pad, sand paper will also work.
Now mount the tire with your pry bar and or spoons, then air up. If its tubeless the bead may not seal enough to get enough air in-to seal the bead. I hold the wheel and bounce it as I rotate it this usually works, to get a seal started. If all else fails use a come-along and chain then wrap around the tread and ratchet down till the wall of the tire pushes out to the wheel then air-up to seal the bead, then bleed the air remove the come-along, and air up again.
Balance: On a tubless tire mark the location of tire in relation to the wheel before dismounting if the wheel is balanced, Then mount it in the same position. On large semis its rare to balance the tire and wheel. Its generally only done if there is a vibration problem. On farm and constriction equipment its too slow moving and wont matter. The thing with balance is on a large tire its less important than on a small tire, because a small tire spins faster to achieve the same road speed as a large tire. Another trick for balance is to add in balls before mounting, golf balls, tennis balls, any thing of the like will work. The balls will balance the tire when it is spinning.
I like to do my own tire repairs, I started doing tires when I was a diesel mechanic. Not often but I would repair a tire when need. In big truck land doing a tire by hand is basic 101, you can also dismount a car light-truck or implement tire by hand, the tire shops use a machine on small tires but if you have more time than money read on. Besides, after a collapse a tire shop may not be available.
Start by removing the valve stem core, the top pic is the tool to remove it. Next you need to break the bead on the tire and rim. I use an out-rigger from a crane truck, it hydraulic moves down and puts pressure on the tire breaking it from the wheel. They make a sledge hammer for this but my way is less work, you can also use a tractor bucket to do this or use a bottle jack and position the tire under something heavy like a vehicle and place the bottle jack in between them and jack away. Also you could use a vehicle and drive over the tire to break the bead. However you decide to do it be careful not to bend the rim. If you do bend the wheel use a sledge hammer with a tapered end and pound it back to a reasonably true condition.
Basically you have two types of set ups for tires most common is a tubeless radial, that's what is on every car and light truck since the 50's older semis and implements have a tube. Some tubes are radials some are not. If it has a tube and the tire says Radial that's what tube goes in it. Today, I'm changing an implement tire.
Now you need two bars the long bar with the curved ends is called a tire spoon. Two spoons are better but I use a pry bar. Stand on the tire so it is half way down the wheel. The wheel is recessed inside at about the half way area of the wheel. Note on a dully wheel the recess is on one side so you need to dismount on the side closest to the wheel recess. Look closely and you will see what I mean. You need to pry the lip off the tire over the rim. The recess in the wheel provides room to allow the side being pried on enough room to do this. After you get one portion over insert your pry bar to hold it out, then remove the spoon and pull another part of the tire over with the spoon, Do this a few times till its over the rim. Do the same to remove the second tire bead. If its a tube and tire just remove one bead of the tire and remove the tube.
Now just follow the directions on the patch kit its available at auto part stores and farm supply stores.I forgot to mention if its a tubeless tire mark the location of the puncture before removing the tire. If you cant find the hole in the tire or tube dunk it under water, I use a horse trough. On a radial tire use a "radial only" patch. On all others any patch should work. To patch a tube you can also use a piece of an old tire, as a patch. Be sure to rough up any gluing surface of the rubber. The patch kit comes with a metal scoring tab, I use a die grinder with a buffing pad, sand paper will also work.
Now mount the tire with your pry bar and or spoons, then air up. If its tubeless the bead may not seal enough to get enough air in-to seal the bead. I hold the wheel and bounce it as I rotate it this usually works, to get a seal started. If all else fails use a come-along and chain then wrap around the tread and ratchet down till the wall of the tire pushes out to the wheel then air-up to seal the bead, then bleed the air remove the come-along, and air up again.
Balance: On a tubless tire mark the location of tire in relation to the wheel before dismounting if the wheel is balanced, Then mount it in the same position. On large semis its rare to balance the tire and wheel. Its generally only done if there is a vibration problem. On farm and constriction equipment its too slow moving and wont matter. The thing with balance is on a large tire its less important than on a small tire, because a small tire spins faster to achieve the same road speed as a large tire. Another trick for balance is to add in balls before mounting, golf balls, tennis balls, any thing of the like will work. The balls will balance the tire when it is spinning.
Labels:
Vehicle
Thursday, July 15, 2010
Sign
Sign
I have signs on my property to identify it as private, and to warn against trespass. The signs take a beating from the wind. If I hang a sign the wind will tear it of before the months end. Here is my super-duper cure all fix for wind molestation of signs.
I think its very important to clearly post no trespassing signs, If a person were to trespass, and I perceived them as a threat, then dealt with them accordingly. The fact that they were beyond the boundary of posted property, would definitely help in a justifacatin for use of force.
Here is the makings of a sign, they are for sale signs, that I will hang on equipment to sell. Of course the making is the same as a trespass sign.
Its pretty basic but since blog ink is free, Why not!
I get the signs at the farm supply store, I prefer the metal 2.50 dollar type, But they only had the plastic 1.09 dollar type in stock today. (I just took what they had ..And I liked-it... That's the breaks of living in a socialist country).
Above you will see a board cut to the size of the sign, ply-wood will work I used OSB because that's what I had in the scrap pile. Caulking and gun, doesn't mater what type even in-door cheap caulking is fine for this job. A staple gun and hammer.
The caulking serves as glue to keep the wind from working under the sign, and separating the sign from the board. Construction adhesive would also work, but I have caulking on hand for weatherizing. So I just use what I had on hand.
Next press the sign to the caulked board then use the staple gun and put the staples in the corners, use the hammer to tap the staples flush. Then drill holes in the top and bottom of the board-sign and secure with wire. The lettering will fade in the years to come, but the sign will be there till you remove it.
I have signs on my property to identify it as private, and to warn against trespass. The signs take a beating from the wind. If I hang a sign the wind will tear it of before the months end. Here is my super-duper cure all fix for wind molestation of signs.
I think its very important to clearly post no trespassing signs, If a person were to trespass, and I perceived them as a threat, then dealt with them accordingly. The fact that they were beyond the boundary of posted property, would definitely help in a justifacatin for use of force.
Here is the makings of a sign, they are for sale signs, that I will hang on equipment to sell. Of course the making is the same as a trespass sign.
Its pretty basic but since blog ink is free, Why not!
I get the signs at the farm supply store, I prefer the metal 2.50 dollar type, But they only had the plastic 1.09 dollar type in stock today. (I just took what they had ..And I liked-it... That's the breaks of living in a socialist country).
Above you will see a board cut to the size of the sign, ply-wood will work I used OSB because that's what I had in the scrap pile. Caulking and gun, doesn't mater what type even in-door cheap caulking is fine for this job. A staple gun and hammer.
The caulking serves as glue to keep the wind from working under the sign, and separating the sign from the board. Construction adhesive would also work, but I have caulking on hand for weatherizing. So I just use what I had on hand.
Next press the sign to the caulked board then use the staple gun and put the staples in the corners, use the hammer to tap the staples flush. Then drill holes in the top and bottom of the board-sign and secure with wire. The lettering will fade in the years to come, but the sign will be there till you remove it.
Labels:
Ranch
Wednesday, July 14, 2010
Goats
We got some goats the other day. I wanted them for weed control, as a stroke of luck we found a milk goat with her 1yr old kid for 100 for the pair. The kid is half meat goat and half milk goat. Both are so nice I would be hard pressed to eat ether one. We put them in a horse coral the first few nights, just to get them conditioned to the new home, confinement is a good practice with all new animals before giving them room to roam. They need time to understand you are the new owner, and this is their new home.
Here is a horse checking out the goats in the pin. Another good reason to pin-up new animals, the other resident animals could harass, or run the new comers off.
Now the goats are roaming free, they are much more friendly than expected. The last owner did a good job with them, as they are accustomed to being handled. They haven't roamed far yet, most times they are lurking near the house, and they have walked inside when the door is open. Usually when I go from the house to the shop they're on my heals.
I'm Going to use portable panels to pin them up in the areas that have weed infestations. For now they have to find there own weeds.
Here is a horse checking out the goats in the pin. Another good reason to pin-up new animals, the other resident animals could harass, or run the new comers off.
Now the goats are roaming free, they are much more friendly than expected. The last owner did a good job with them, as they are accustomed to being handled. They haven't roamed far yet, most times they are lurking near the house, and they have walked inside when the door is open. Usually when I go from the house to the shop they're on my heals.
I'm Going to use portable panels to pin them up in the areas that have weed infestations. For now they have to find there own weeds.
Henry David Thoreau
"'That government is best which governs not at all;' and when men are prepared for it, that will be the kind of government which they will have."[4]
-Thoreau
Thoreau's writings influenced many public figures. Political leaders and reformers like Mahatma Gandhi, President John F. Kennedy, civil rights activist Martin Luther King, Jr., Supreme Court Justice William O. Douglas, and Russian author Leo Tolstoy all spoke of being strongly affected by Thoreau's work, particularly Civil Disobedience. ( I just cut and pasted the above, they said it better than I could, however, I do not approve of JFK. He was a lying rat)
In a nut shell, I think,an operative lesson that would serve us well in our times of repressive government is Zero cooperation to encroaching control by government.
Of course the pivotal point of the encroachment of personal rights of freedom, these days, to not participate is to be in violation of law. For example not paying for health insurance is soon to be a punishable offense.
Here is his Wikipedia page.
-Thoreau
Thoreau's writings influenced many public figures. Political leaders and reformers like Mahatma Gandhi, President John F. Kennedy, civil rights activist Martin Luther King, Jr., Supreme Court Justice William O. Douglas, and Russian author Leo Tolstoy all spoke of being strongly affected by Thoreau's work, particularly Civil Disobedience. ( I just cut and pasted the above, they said it better than I could, however, I do not approve of JFK. He was a lying rat)
In a nut shell, I think,an operative lesson that would serve us well in our times of repressive government is Zero cooperation to encroaching control by government.
Of course the pivotal point of the encroachment of personal rights of freedom, these days, to not participate is to be in violation of law. For example not paying for health insurance is soon to be a punishable offense.
Here is his Wikipedia page.
Labels:
goverment
Tuesday, July 13, 2010
Sage brush
Sage brush
I have several types of sage at my compound, I mean ranch. I have been wanting to remove the bulk of it because it is so thick,and grazing grass has to compete with it. Increasing the livestock carrying capacity is the primary reason. Also sage gives the place a dry desert feel so removal is in part for cosmetic reasons. I made a scraper several years ago and used it to clear a small area in front of my shop, perhaps only two or three acres, It was very successful in removing the sage brush and grass grew in nicely the next year. The scraper was made out of I beam that I welded in a square box shape, and I used a chain to pull it with a pick-up. The scraper also worked well to smooth out the driveway. The front I beam would knock down the high spots and dirt would accumulate in the box and fill in the pot holes as it would slide over the low surface. The sage here is very stout some have stumps larger than 8 inches most are smaller but the large ones are remembered well after plowing through the field and the box would jerk to a halt and I would slam against the wheel from the sudden loss of momentum. Sadly the box scraper-smoothie could only take so much abuse till the metal sheared in half where the chain mounted. I switched to pulling it from the other end to get by till the project was completed. It didn't work as well and soon broke again since it wasn't as strong having been broken previously. My welder was broken at the time so I wasn't able to repair the scraper. Its a Lincoln diesel generator welder and the starter had gone out because we were using it for our house-hold power during the first year here. we had a generator for the house but that broke and the welder was filling in for it. Is it just me or is there a pattern of things breaking.
Anyways, I have since repaired the welder and I have built a new and improved smoothy scraper this time I built it with reinforcements and a steel rail road track was added for weight and scraping. Its welded across the mid section and a blade from a loader bucket was welded to the front for scraping its also very heavy.
The entire assembly weighs in around 2k so its tough to get moving but it crashes through most obstical when it gets up to a cruising speed. This scraper was built durring the last fence project, to run along the planed fence lines. Because it easier and nicer to fence a smooth surface than a rugged one. Large sage needs to be removed because its tought to string a straight wire through brush. A strong fence needs to be straight. Sage brush is actualy a type evergreen tree.
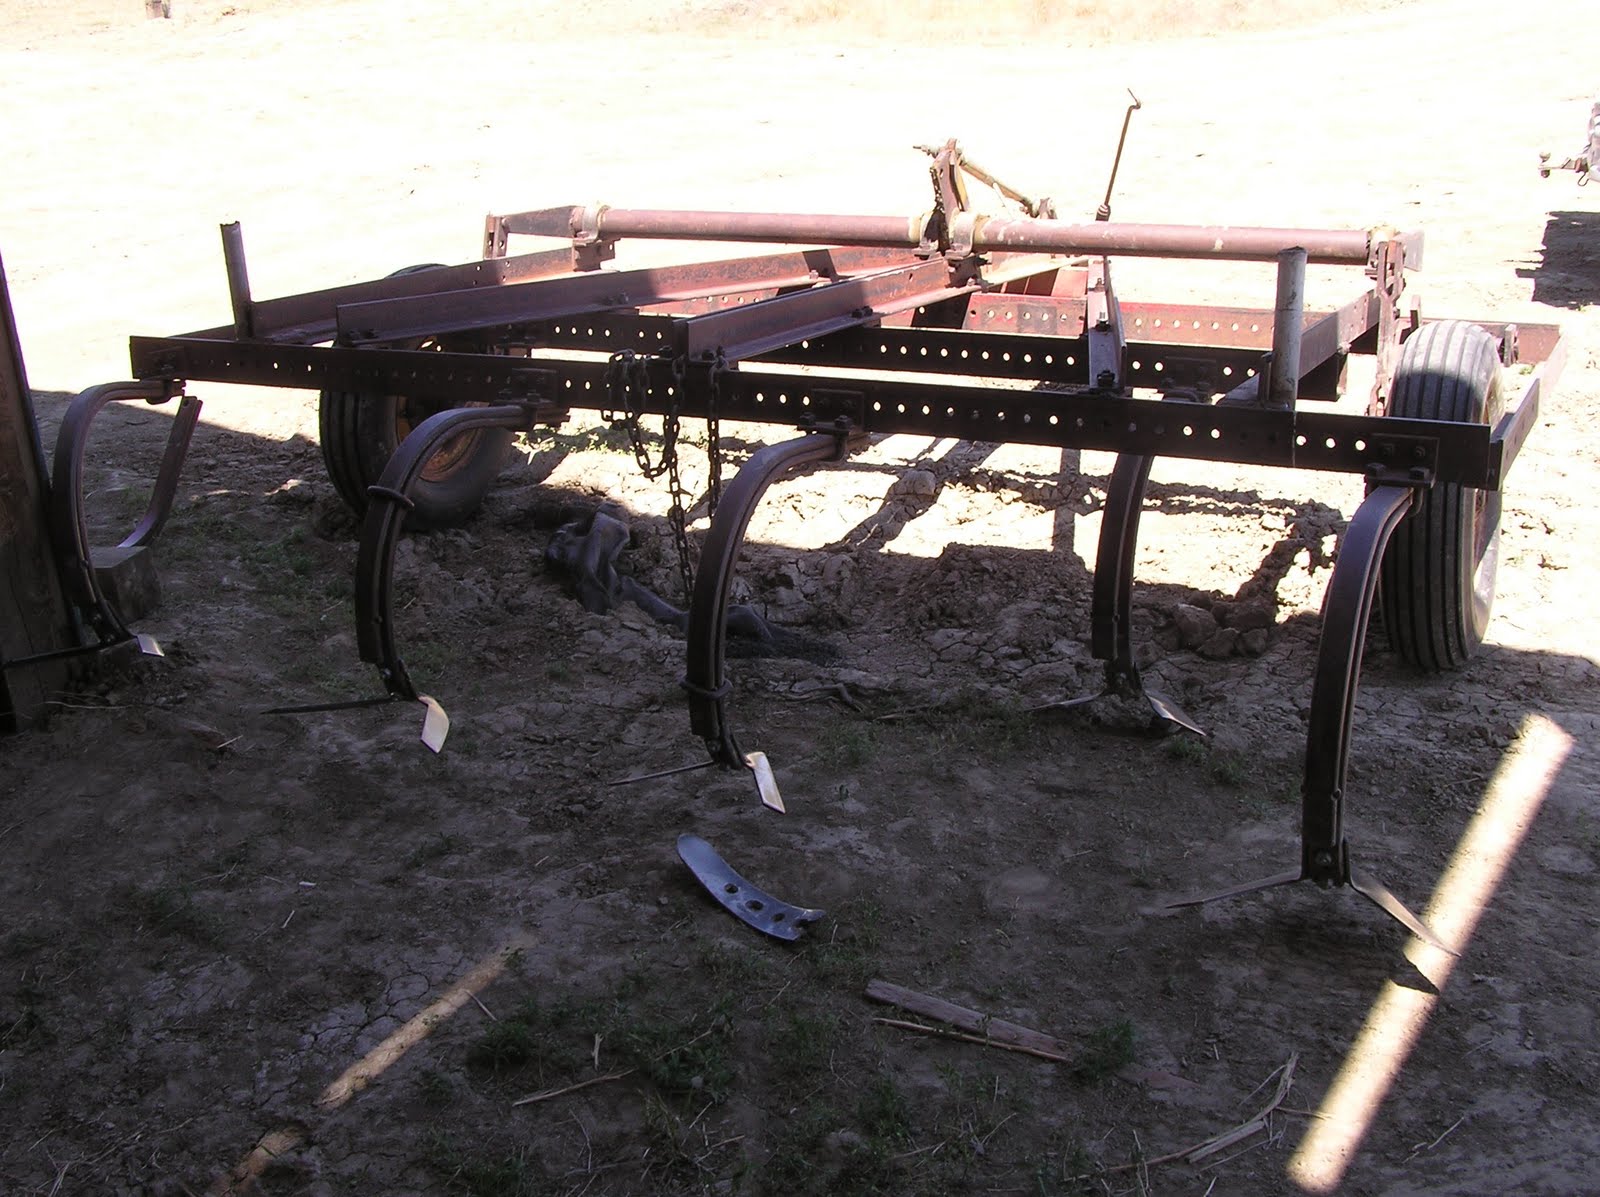
I was at an auction a while back and an old plow was sold in the last group of items so I picked it up for 150. It works well to remove the sage by plowing through it several times from different angles and directions.
I've been using a ford f250 4x4 to pull the plow and box scraper. I had traded for the truck a couple years back and originally used it to haul water. The problem is, it has a gas engine 460 and the fuel millage isn't great so I use my diesel Dodge for water runs and leave the Ford on the ranch for running about and fencing. Now its a tractor too. Speaking of tractors I tried using a guys tractor and it was getting stuck every time I went out in the pasture, The Ford gets stuck some times too, but a pick-up is easier to get out than a tractor. Now I have all wheels chained, It hasn't gotten stuck yet.
I broke the bumper off today pulling the plow. I started to build a bumper out of scrap steel I had around here but I ran out of oxygen for the torch so I will have to resume after I get the bottle refilled.
Here are some before and after pic of a turn out pasture I plowed the day before. Most of the sage in the pic is plowed and up-rooted when It dries up and breaks down it will look nicer. I left some of the greasewood sage because it is more treelike than the gray sage (I'll pretend its a real tree). It also stays dark green like that year round. The ones in this pic are over 6 ft tall, So its a nice little tree. I have several hundred acres to go, I'll keep you posted.
I have several types of sage at my compound, I mean ranch. I have been wanting to remove the bulk of it because it is so thick,and grazing grass has to compete with it. Increasing the livestock carrying capacity is the primary reason. Also sage gives the place a dry desert feel so removal is in part for cosmetic reasons. I made a scraper several years ago and used it to clear a small area in front of my shop, perhaps only two or three acres, It was very successful in removing the sage brush and grass grew in nicely the next year. The scraper was made out of I beam that I welded in a square box shape, and I used a chain to pull it with a pick-up. The scraper also worked well to smooth out the driveway. The front I beam would knock down the high spots and dirt would accumulate in the box and fill in the pot holes as it would slide over the low surface. The sage here is very stout some have stumps larger than 8 inches most are smaller but the large ones are remembered well after plowing through the field and the box would jerk to a halt and I would slam against the wheel from the sudden loss of momentum. Sadly the box scraper-smoothie could only take so much abuse till the metal sheared in half where the chain mounted. I switched to pulling it from the other end to get by till the project was completed. It didn't work as well and soon broke again since it wasn't as strong having been broken previously. My welder was broken at the time so I wasn't able to repair the scraper. Its a Lincoln diesel generator welder and the starter had gone out because we were using it for our house-hold power during the first year here. we had a generator for the house but that broke and the welder was filling in for it. Is it just me or is there a pattern of things breaking.
Anyways, I have since repaired the welder and I have built a new and improved smoothy scraper this time I built it with reinforcements and a steel rail road track was added for weight and scraping. Its welded across the mid section and a blade from a loader bucket was welded to the front for scraping its also very heavy.
The entire assembly weighs in around 2k so its tough to get moving but it crashes through most obstical when it gets up to a cruising speed. This scraper was built durring the last fence project, to run along the planed fence lines. Because it easier and nicer to fence a smooth surface than a rugged one. Large sage needs to be removed because its tought to string a straight wire through brush. A strong fence needs to be straight. Sage brush is actualy a type evergreen tree.
I was at an auction a while back and an old plow was sold in the last group of items so I picked it up for 150. It works well to remove the sage by plowing through it several times from different angles and directions.
I've been using a ford f250 4x4 to pull the plow and box scraper. I had traded for the truck a couple years back and originally used it to haul water. The problem is, it has a gas engine 460 and the fuel millage isn't great so I use my diesel Dodge for water runs and leave the Ford on the ranch for running about and fencing. Now its a tractor too. Speaking of tractors I tried using a guys tractor and it was getting stuck every time I went out in the pasture, The Ford gets stuck some times too, but a pick-up is easier to get out than a tractor. Now I have all wheels chained, It hasn't gotten stuck yet.
I broke the bumper off today pulling the plow. I started to build a bumper out of scrap steel I had around here but I ran out of oxygen for the torch so I will have to resume after I get the bottle refilled.
Here are some before and after pic of a turn out pasture I plowed the day before. Most of the sage in the pic is plowed and up-rooted when It dries up and breaks down it will look nicer. I left some of the greasewood sage because it is more treelike than the gray sage (I'll pretend its a real tree). It also stays dark green like that year round. The ones in this pic are over 6 ft tall, So its a nice little tree. I have several hundred acres to go, I'll keep you posted.
Thursday, July 1, 2010
Fencing
Well I Completed the fencing along the rail road. I moved the cows to the new pasture on Monday. I have been working on fencing the back side of the property, bordering BLM land. I use a GPS to locate boundary lines then I drive in a stake with a flag taped to it. Here is a skull I found during my boundary search.
Here is the homested From one of the rear boundary lines.
Subscribe to:
Posts (Atom)


![[Most Recent Quotes from www.kitco.com]](http://www.kitconet.com/charts/metals/gold/t24_au_en_usoz_2.gif)